> ## Documentation Index
> Fetch the complete documentation index at: https://docs.pylar.ai/llms.txt
> Use this file to discover all available pages before exploring further.
# Connecting via SSH
> Enhanced security option: Connect databases to Pylar using SSH tunnels for maximum data privacy
## Overview
For enhanced data privacy and security, you can connect databases to Pylar using SSH tunnels. This approach provides an additional layer of security by routing database connections through a secure SSH tunnel.
## When to Use SSH Connections
SSH connections are ideal when:
* ✅ You want maximum security for sensitive databases
* ✅ Your database is in a private VPC or network
* ✅ You need additional access control layers
* ✅ Compliance requirements demand enhanced security
* ✅ You want to use a dedicated user account approach
SSH connections provide the highest level of security by routing all database traffic through an encrypted SSH tunnel.
## How SSH Connections Work
### Architecture
```
Pylar → SSH Tunnel (Bastion VM) → Database Auth Proxy → Your Database
```
1. **Pylar** connects to your **Bastion VM** via SSH
2. **Bastion VM** runs the **Database Auth Proxy**
3. **Auth Proxy** connects to your **database**
4. All traffic is encrypted through the SSH tunnel
### Benefits
* ✅ **Enhanced Security**: All traffic encrypted through SSH
* ✅ **Network Isolation**: Database stays in private network
* ✅ **Access Control**: Additional layer of authentication
* ✅ **Audit Trail**: Monitor SSH connections separately
## Prerequisites
Before setting up SSH connections:
* ✅ Access to create a Virtual Machine (VM)
* ✅ Ability to install software on the VM
* ✅ Database in private VPC or network
* ✅ Admin access to configure network settings
* ✅ Understanding of SSH key management
## Step-by-Step Setup
### Step 1: Create a Bastion VM
Set up a Virtual Machine to act as your bastion:
1. **Create VM in GCP** (or your cloud provider):
* Choose appropriate VM size
* Place VM in same VPC as database (or network-connected)
* Configure VM with public IP or VPN access
* Install operating system (Linux recommended)
2. **Configure Network**:
* Open port 22 (SSH) for Pylar's IP (`34.122.205.142`)
* Ensure VM can reach your database
* Configure firewall rules appropriately
### Step 2: Install Database Auth Proxy
On the bastion VM, install the **AlloyDB Auth Proxy** (or appropriate database proxy):
1. **Download and Install**:
```bash theme={null}
# Example for AlloyDB
wget https://alloydb-auth-proxy-release.s3.amazonaws.com/alloydb-auth-proxy
chmod +x alloydb-auth-proxy
```
2. **Configure Proxy**:
* Set up proxy to connect to your database
* Configure proxy to listen on localhost
* Test proxy connection to database
The database auth proxy handles authentication and provides an additional security layer between the SSH tunnel and your database.
### Step 3: Generate SSH Keypair
Pylar will generate an SSH keypair for your workspace:
1. In Pylar, go to **Connections** → **SSH Configuration**
2. Pylar generates a public/private keypair
3. **Copy the public key** from your integrations page
4. Save it for use in the next step
Keep your private key secure. Pylar manages it, but ensure you have backups if needed.
### Step 4: Set Up Service Account and User on Bastion
1. **Create Service Account in GCP**:
* Create a service account for Pylar
* Grant necessary permissions
* Note the service account details
2. **Create User on Bastion**:
* Create a new user on the bastion VM
* Link user to the service account
* Log in as this user
3. **Add SSH Public Key**:
* Add the public key you copied from Pylar
* Add it to `~/.ssh/authorized_keys`:
```bash theme={null}
echo "YOUR_PUBLIC_KEY_HERE" >> ~/.ssh/authorized_keys
chmod 600 ~/.ssh/authorized_keys
```
* Verify SSH access works
### Step 5: Configure Database in Pylar
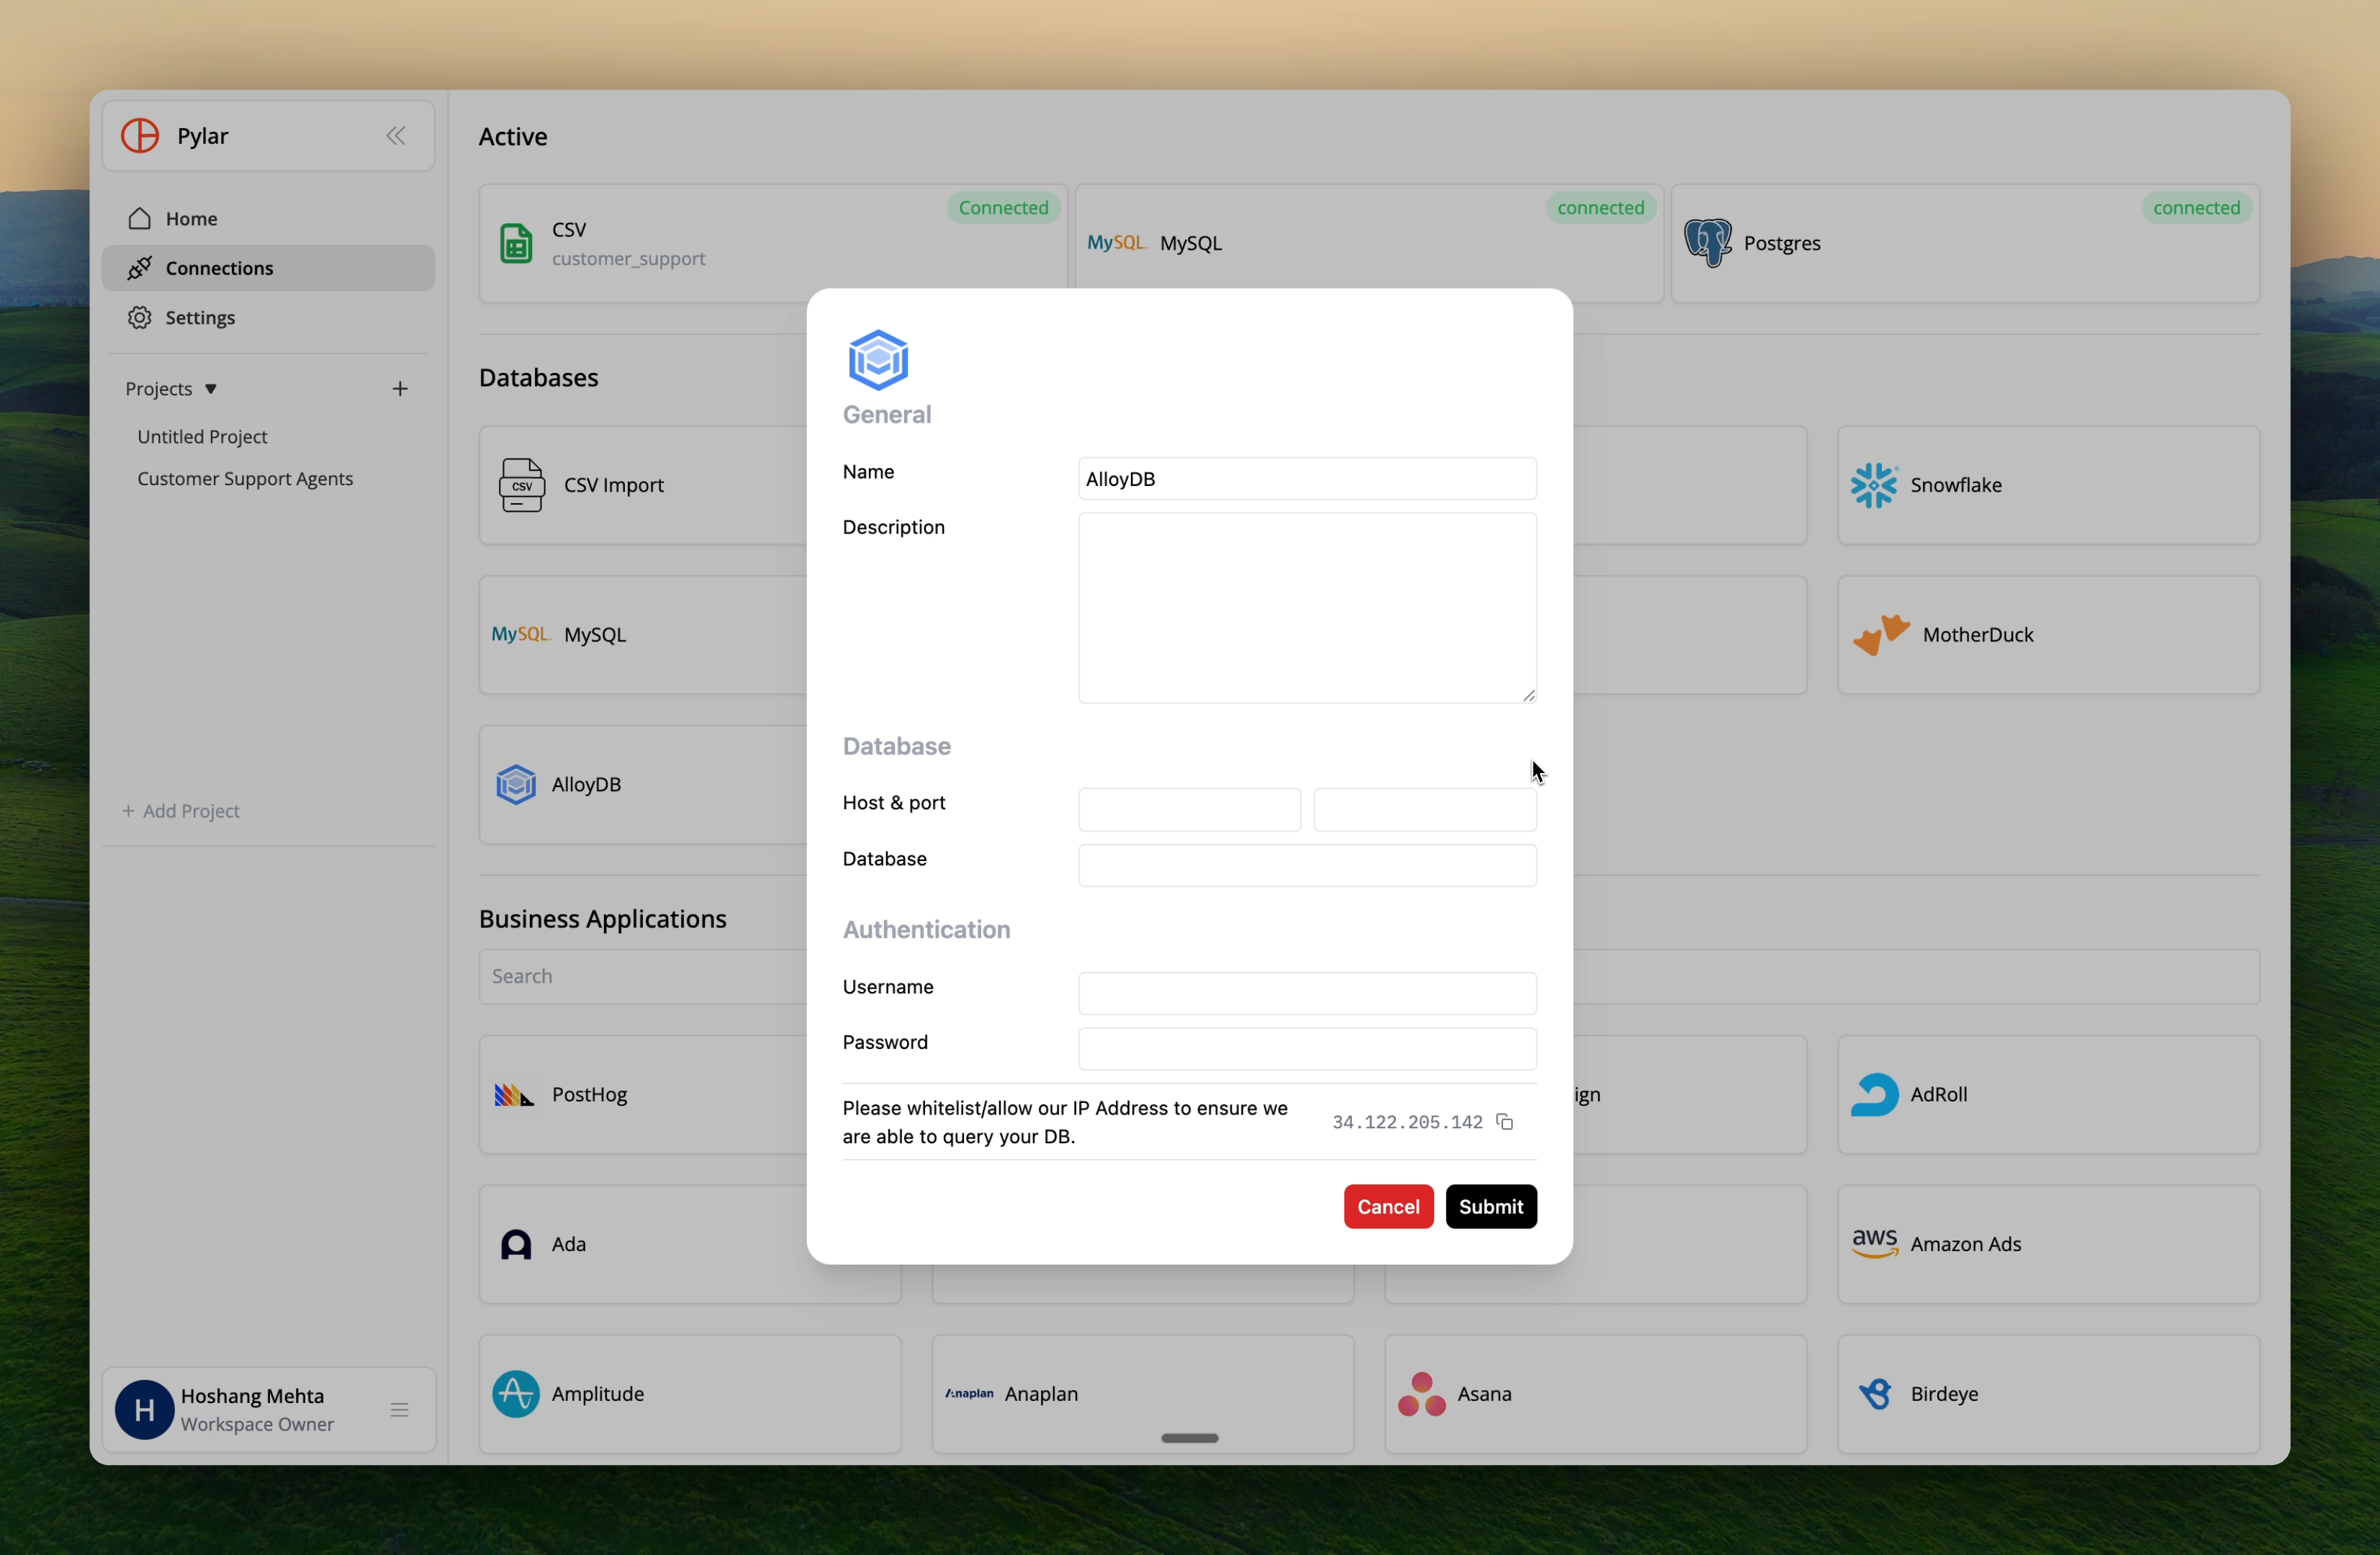 In Pylar's connection setup:
#### SSH Section
1. **Host**: Enter the hostname or IP of your bastion VM
2. **Port**: SSH port (usually `22`)
3. **Username**: The user name under which you added the SSH key
#### Database Section
1. **Host**: Enter `127.0.0.1` (localhost on the bastion)
2. **Port**: Port of the AlloyDB Auth Proxy (usually `5432`)
3. **Database Name**: Name of your AlloyDB database
4. **Username**: Username for the AlloyDB user you created for Pylar
5. **Password**: Password for the AlloyDB user
The database host is `127.0.0.1` because the proxy runs on the bastion VM itself. The proxy connects to your actual database.
## Security Considerations
### SSH Key Management
* ✅ **Secure Storage**: Keys are stored securely in Pylar
* ✅ **Key Rotation**: Rotate SSH keys periodically
* ✅ **Access Control**: Limit who can access SSH keys
* ✅ **Monitoring**: Monitor SSH access logs
### Bastion VM Security
* ✅ **Hardening**: Apply security hardening to the VM
* ✅ **Updates**: Keep VM and software updated
* ✅ **Monitoring**: Monitor VM access and activity
* ✅ **Backup**: Have backup/recovery procedures
### Network Security
* ✅ **Firewall Rules**: Restrict SSH access to Pylar IP only
* ✅ **VPN Option**: Consider VPN instead of public IP
* ✅ **Private Networks**: Keep database in private network
* ✅ **Access Logs**: Monitor all network access
## Benefits of SSH Connections
### Enhanced Security
* **Encrypted Tunnel**: All traffic encrypted through SSH
* **Network Isolation**: Database never directly exposed
* **Additional Authentication**: SSH key + database credentials
* **Audit Trail**: Separate logs for SSH and database access
### Compliance
* **Regulatory Requirements**: Meets strict compliance needs
* **Audit Trails**: Complete logging of all access
* **Access Controls**: Multiple layers of security
* **Data Privacy**: Maximum protection for sensitive data
## Troubleshooting
### Issue: SSH connection fails
**Solutions**:
* Verify SSH public key is in authorized\_keys
* Check bastion VM is accessible
* Verify port 22 is open
* Check SSH service is running on bastion
### Issue: Database connection through proxy fails
**Solutions**:
* Verify proxy is running on bastion
* Check proxy can reach database
* Verify database credentials
* Review proxy logs
### Issue: Connection timeout
**Solutions**:
* Check network connectivity to bastion
* Verify firewall rules
* Review SSH connection logs
* Test SSH connection manually
## Best Practices
### Bastion VM
* ✅ Use minimal VM size needed
* ✅ Apply security patches regularly
* ✅ Monitor VM resource usage
* ✅ Have backup/recovery plan
### SSH Keys
* ✅ Rotate keys periodically
* ✅ Use strong key types (RSA 4096 or Ed25519)
* ✅ Monitor key usage
* ✅ Revoke keys when no longer needed
### Database Proxy
* ✅ Keep proxy software updated
* ✅ Monitor proxy logs
* ✅ Configure proxy for performance
* ✅ Test proxy connectivity regularly
## Alternative: Dedicated User Account
If you choose the dedicated user account approach without SSH:
1. Create dedicated database user for Pylar
2. Grant limited permissions (read-only if possible)
3. Use audit logging to monitor access
4. Establish limited database views accessible by Pylar user
This provides good security without the complexity of SSH tunnels.
## Next Steps
* [Connection Security](/learn/making-connections/connection-security) - General security practices
* [Managing Connections](/learn/making-connections/managing-connections) - Manage your SSH connections
* [Creating Data Views](/learn/creating-data-views/overview) - Use your secure connections
Learn more security best practices
In Pylar's connection setup:
#### SSH Section
1. **Host**: Enter the hostname or IP of your bastion VM
2. **Port**: SSH port (usually `22`)
3. **Username**: The user name under which you added the SSH key
#### Database Section
1. **Host**: Enter `127.0.0.1` (localhost on the bastion)
2. **Port**: Port of the AlloyDB Auth Proxy (usually `5432`)
3. **Database Name**: Name of your AlloyDB database
4. **Username**: Username for the AlloyDB user you created for Pylar
5. **Password**: Password for the AlloyDB user
The database host is `127.0.0.1` because the proxy runs on the bastion VM itself. The proxy connects to your actual database.
## Security Considerations
### SSH Key Management
* ✅ **Secure Storage**: Keys are stored securely in Pylar
* ✅ **Key Rotation**: Rotate SSH keys periodically
* ✅ **Access Control**: Limit who can access SSH keys
* ✅ **Monitoring**: Monitor SSH access logs
### Bastion VM Security
* ✅ **Hardening**: Apply security hardening to the VM
* ✅ **Updates**: Keep VM and software updated
* ✅ **Monitoring**: Monitor VM access and activity
* ✅ **Backup**: Have backup/recovery procedures
### Network Security
* ✅ **Firewall Rules**: Restrict SSH access to Pylar IP only
* ✅ **VPN Option**: Consider VPN instead of public IP
* ✅ **Private Networks**: Keep database in private network
* ✅ **Access Logs**: Monitor all network access
## Benefits of SSH Connections
### Enhanced Security
* **Encrypted Tunnel**: All traffic encrypted through SSH
* **Network Isolation**: Database never directly exposed
* **Additional Authentication**: SSH key + database credentials
* **Audit Trail**: Separate logs for SSH and database access
### Compliance
* **Regulatory Requirements**: Meets strict compliance needs
* **Audit Trails**: Complete logging of all access
* **Access Controls**: Multiple layers of security
* **Data Privacy**: Maximum protection for sensitive data
## Troubleshooting
### Issue: SSH connection fails
**Solutions**:
* Verify SSH public key is in authorized\_keys
* Check bastion VM is accessible
* Verify port 22 is open
* Check SSH service is running on bastion
### Issue: Database connection through proxy fails
**Solutions**:
* Verify proxy is running on bastion
* Check proxy can reach database
* Verify database credentials
* Review proxy logs
### Issue: Connection timeout
**Solutions**:
* Check network connectivity to bastion
* Verify firewall rules
* Review SSH connection logs
* Test SSH connection manually
## Best Practices
### Bastion VM
* ✅ Use minimal VM size needed
* ✅ Apply security patches regularly
* ✅ Monitor VM resource usage
* ✅ Have backup/recovery plan
### SSH Keys
* ✅ Rotate keys periodically
* ✅ Use strong key types (RSA 4096 or Ed25519)
* ✅ Monitor key usage
* ✅ Revoke keys when no longer needed
### Database Proxy
* ✅ Keep proxy software updated
* ✅ Monitor proxy logs
* ✅ Configure proxy for performance
* ✅ Test proxy connectivity regularly
## Alternative: Dedicated User Account
If you choose the dedicated user account approach without SSH:
1. Create dedicated database user for Pylar
2. Grant limited permissions (read-only if possible)
3. Use audit logging to monitor access
4. Establish limited database views accessible by Pylar user
This provides good security without the complexity of SSH tunnels.
## Next Steps
* [Connection Security](/learn/making-connections/connection-security) - General security practices
* [Managing Connections](/learn/making-connections/managing-connections) - Manage your SSH connections
* [Creating Data Views](/learn/creating-data-views/overview) - Use your secure connections
Learn more security best practices