Prerequisites
Before publishing, ensure:- ✅ Your MCP tools are created and tested
- ✅ Tools work correctly (tested successfully)
- ✅ You’re ready to make tools available to agents
Only publish tools that have been tested and verified to work correctly. Publishing untested tools can lead to agent errors.
Step 1: Publish Your Tools
Access the Publish Button
- Navigate to your project in Pylar
- Look for the “Publish” button in the right sidebar
- Click “Publish” to begin
What Happens
When you click Publish:- Pylar prepares your tools for deployment
- Validates all tool configurations
- Generates secure access credentials
- Makes tools available via MCP server
Step 2: Generate Access Credentials
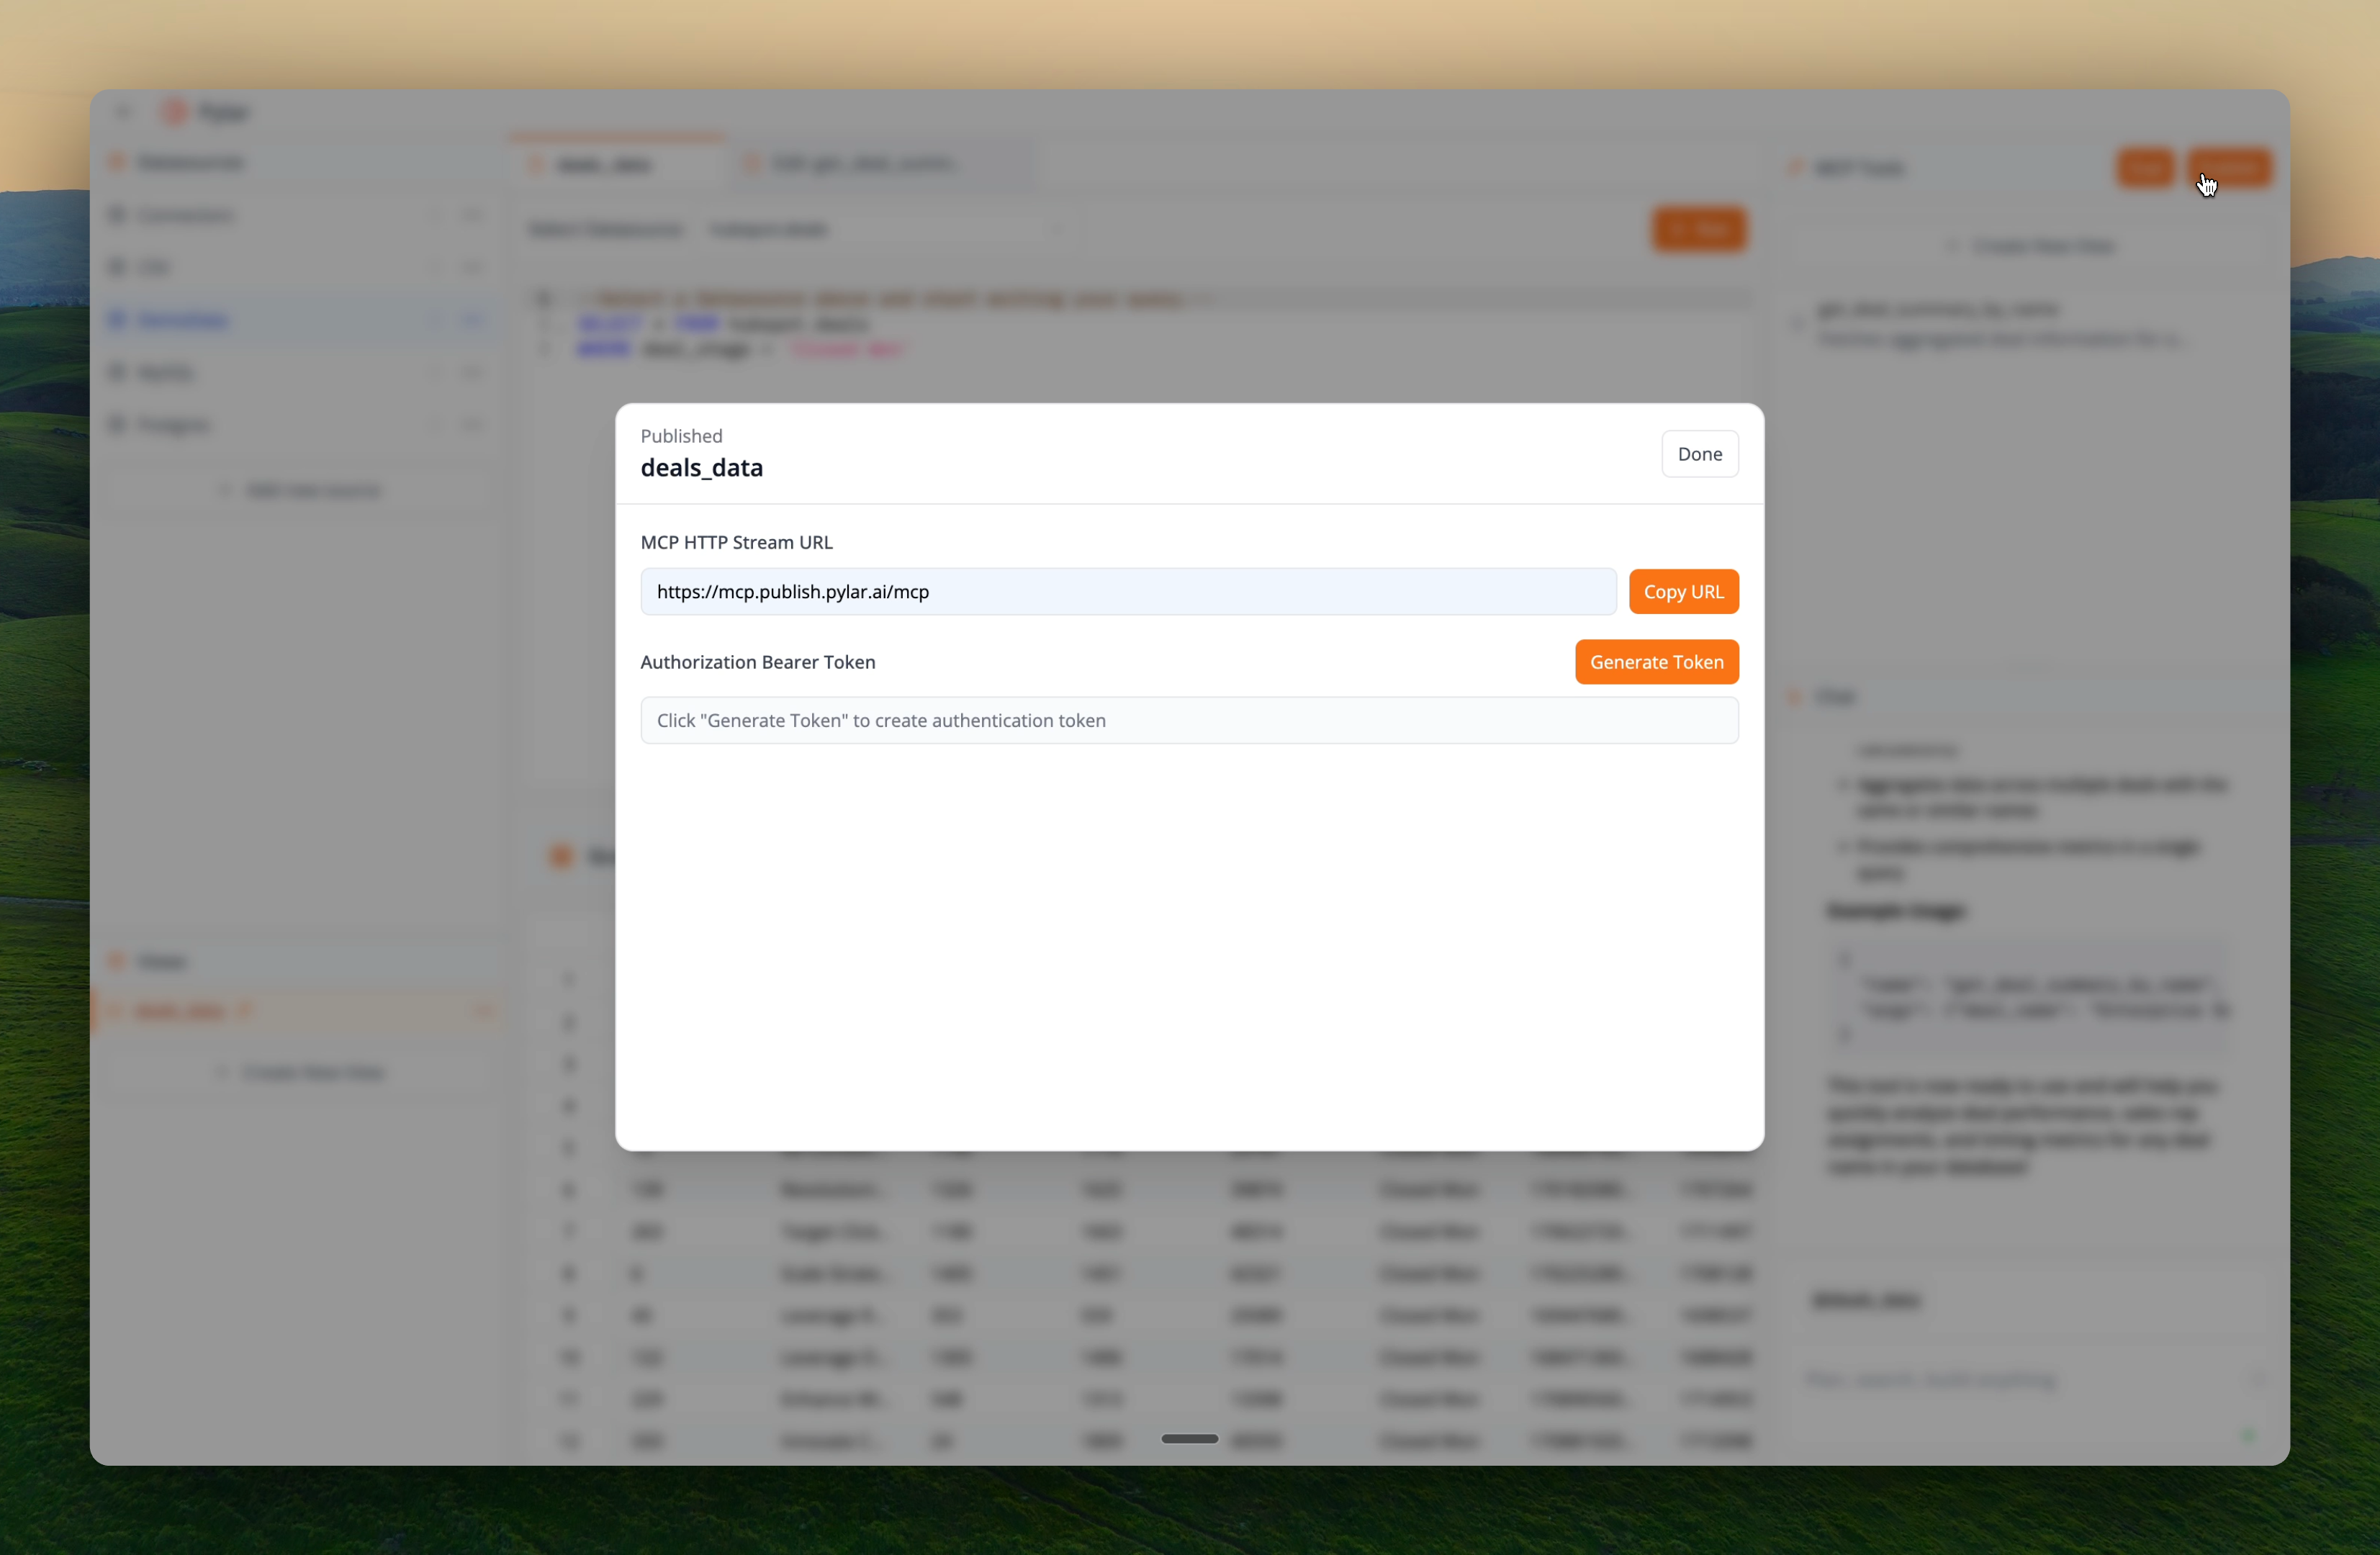
After clicking Publish, a popup window appears.Generate Token
- In the popup, click “Generate Token”
- Pylar creates a secure authorization token
- The token is unique to your project
- Token provides secure access to your tools
Step 3: Copy Connection Details
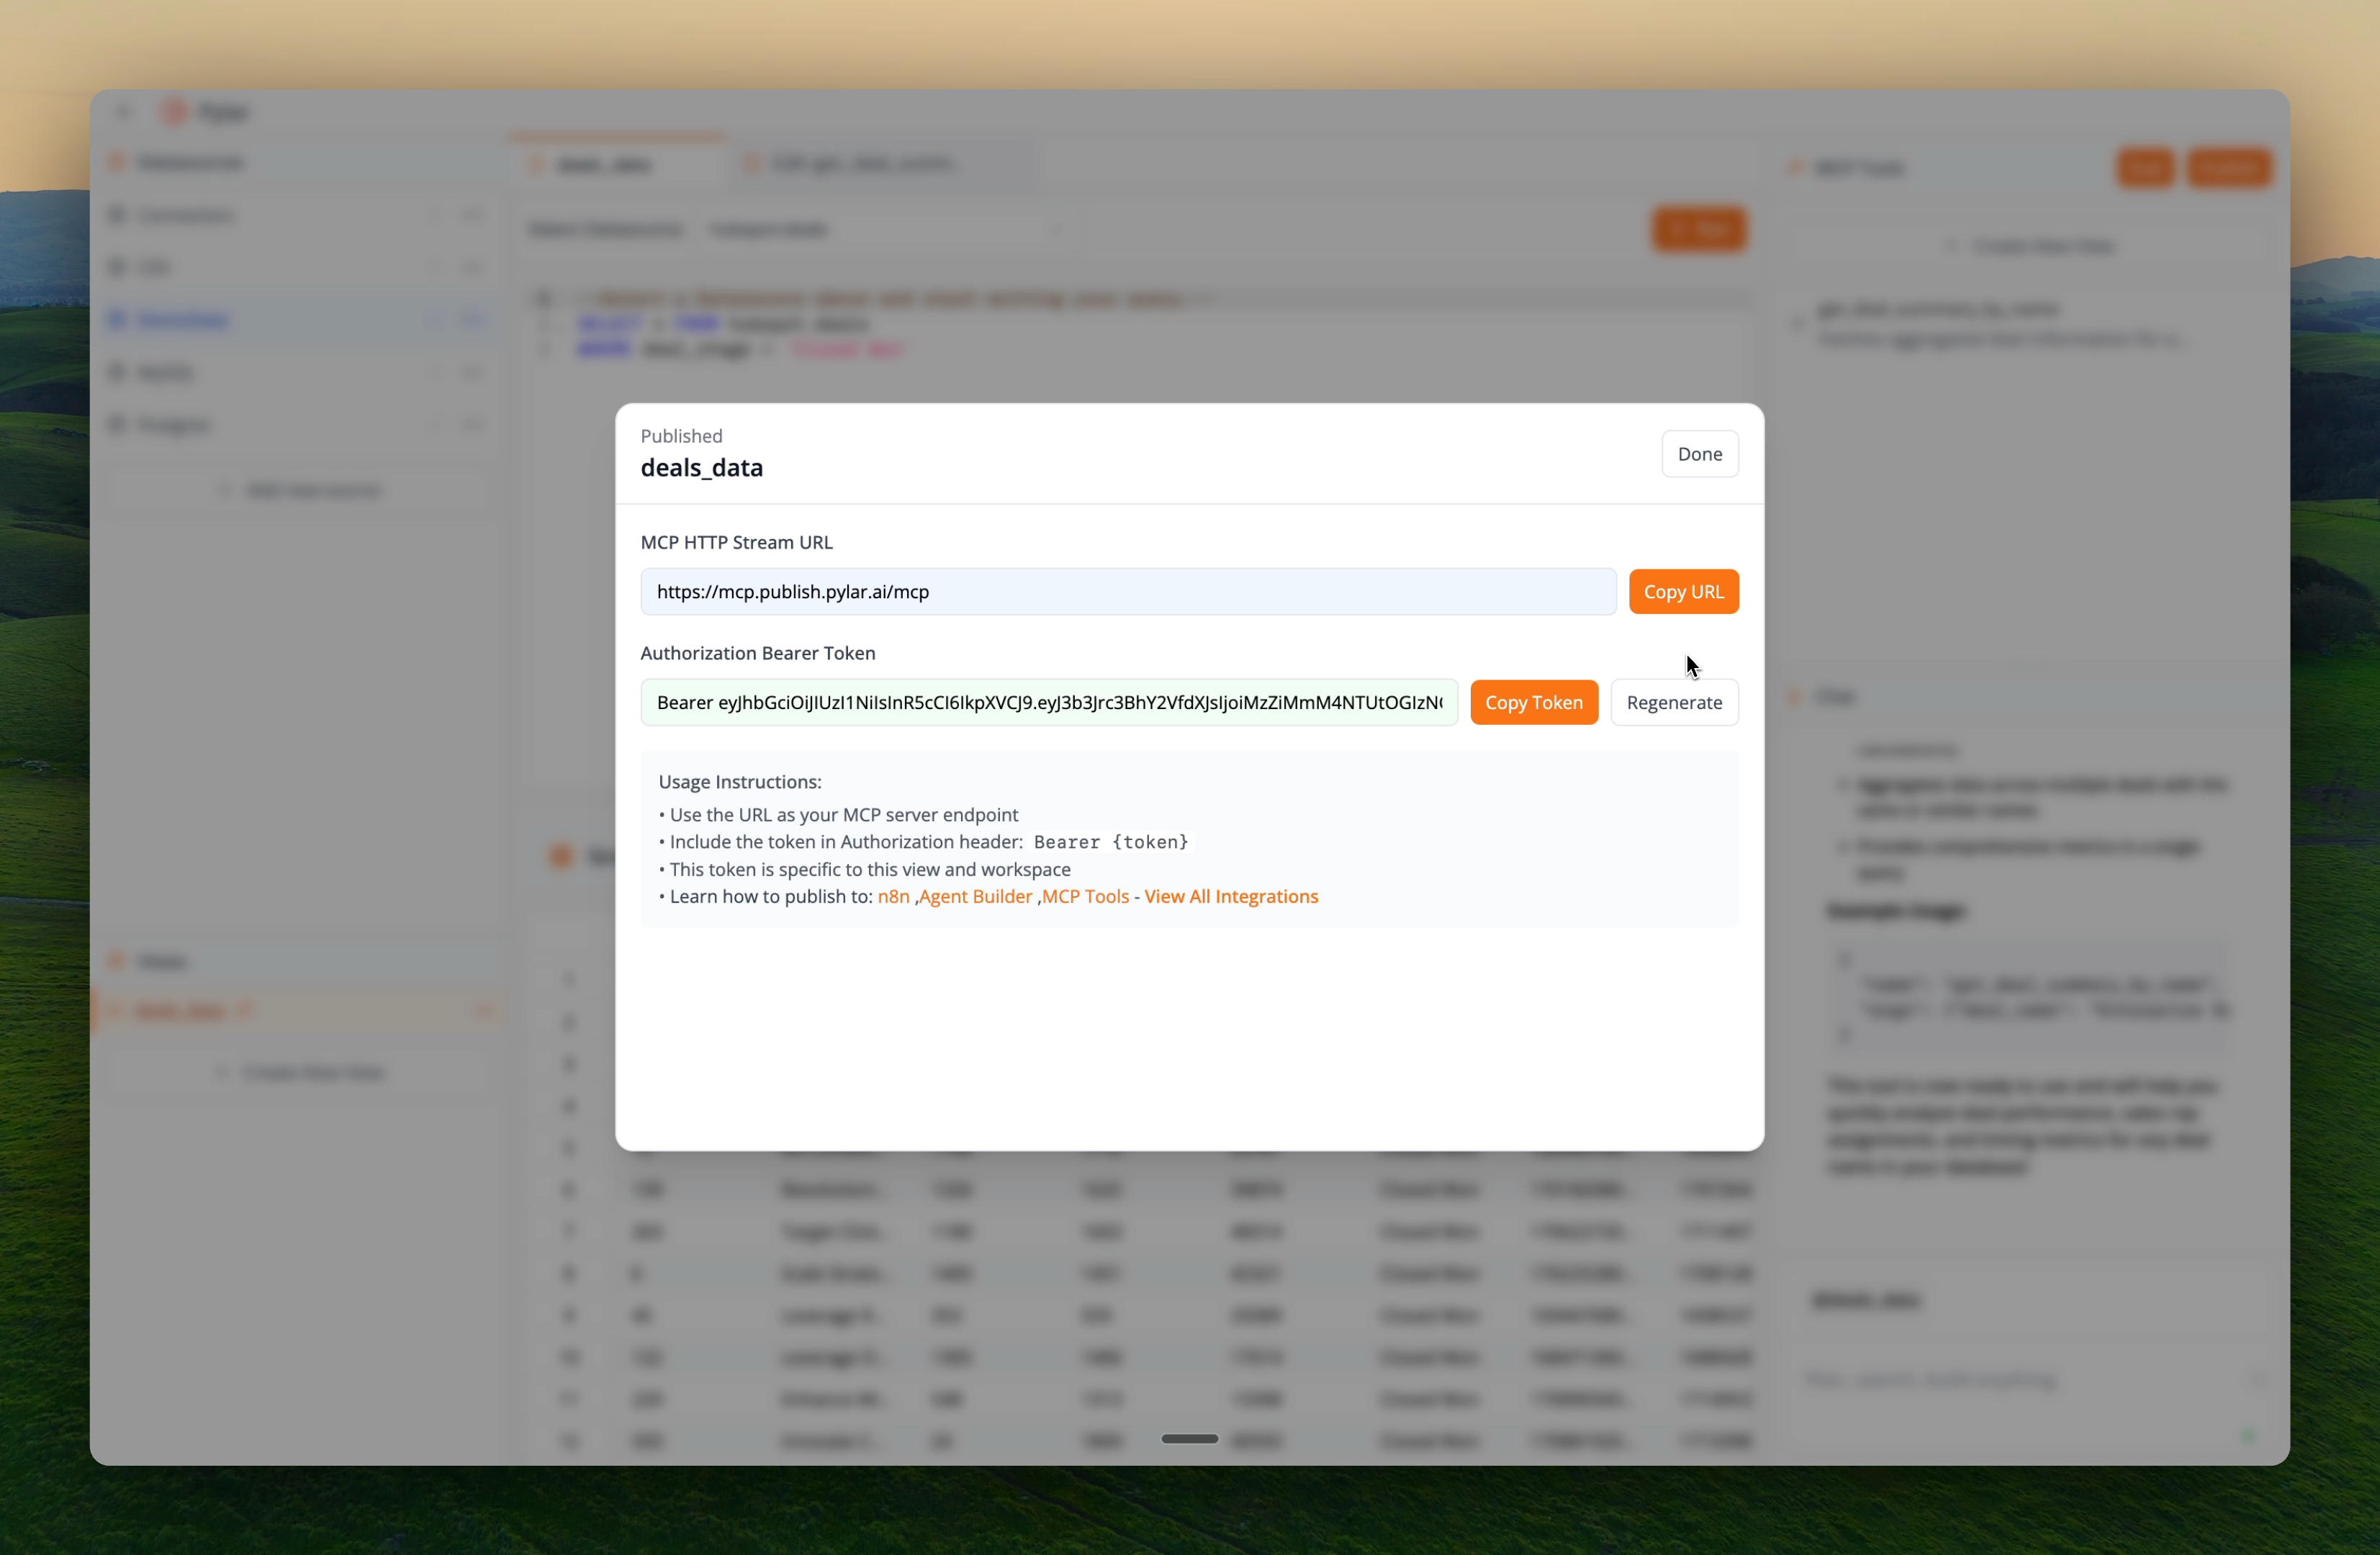
Once the token is generated, you’ll see two critical values:MCP HTTP Stream URL
The URL where your MCP server is accessible:Authorization Bearer Token
The authentication token for secure access:Step 4: Store Credentials Safely
Security Best Practices
- ✅ Store Securely: Use password managers or secure storage
- ✅ Don’t Share Publicly: Never commit tokens to version control
- ✅ Regenerate if Compromised: Generate new tokens if exposed
- ✅ Limit Access: Only share with authorized team members
Where to Store
- Password manager (1Password, LastPass, etc.)
- Secure team documentation (with access controls)
- Environment variables (for programmatic access)
- Secure configuration files (never commit to git)
Understanding Your Credentials
MCP HTTP Stream URL
This is the standard endpoint for MCP servers:- Format:
https://mcp.publish.pylar.ai/mcp - Purpose: Agent builders connect here
- Protocol: Uses MCP (Model Context Protocol)
- Security: Protected by Bearer Token authentication
The MCP HTTP Stream URL is the same for all Pylar projects. Your Bearer Token is what makes your connection unique and secure.
Authorization Bearer Token
This token authenticates your connection:- Format:
Bearer <token_string> - Purpose: Proves authorized access
- Scope: Provides access to your published tools
- Security: Keep it secret and secure
How They Work Together
- Agent builder connects to MCP HTTP Stream URL
- Sends Authorization Bearer Token in request headers
- Pylar validates the token
- Grants access to your published tools
- Agent can now call your tools
What Gets Published
When you publish:- ✅ All MCP Tools: All tools in your project become available
- ✅ Underlying Views: Tools can query their associated views
- ✅ Real-time Access: Tools are immediately accessible
- ✅ Automatic Updates: Changes to tools reflect automatically
After publishing, your tools are live and ready for agents to use. You can update tools anytime without republishing.
Next Steps
Now that your tools are published:- Getting Your Credentials - Detailed guide to connection details
- Connecting to Claude Desktop - Connect to Claude Desktop
- Connecting to Cursor - Connect to Cursor
- Connecting to Windsurf - Connect to Windsurf
Connect to Agent Builder
Learn how to connect your tools to agent builders