Overview
Connecting Pylar to BigQuery allows you to access and analyze your data stored in BigQuery directly from Pylar. Your data remains in BigQuery—Pylar indexes it for easier querying and executes queries on your BigQuery infrastructure.Prerequisites
- ✅ Pylar account with Analyst role or higher
- ✅ Google Cloud Project with BigQuery enabled
- ✅ Service account with BigQuery access permissions
- ✅ Service account JSON key file
Step 1: Access Connections
- Navigate to the “Connections” tab on the left side of your Pylar interface
- You’ll see different sections for connection types
Step 2: Find BigQuery
- In the “Databases” section, find and click on the BigQuery icon
- The connection setup screen will open
Step 3: Configure Connection
Fill in the connection details: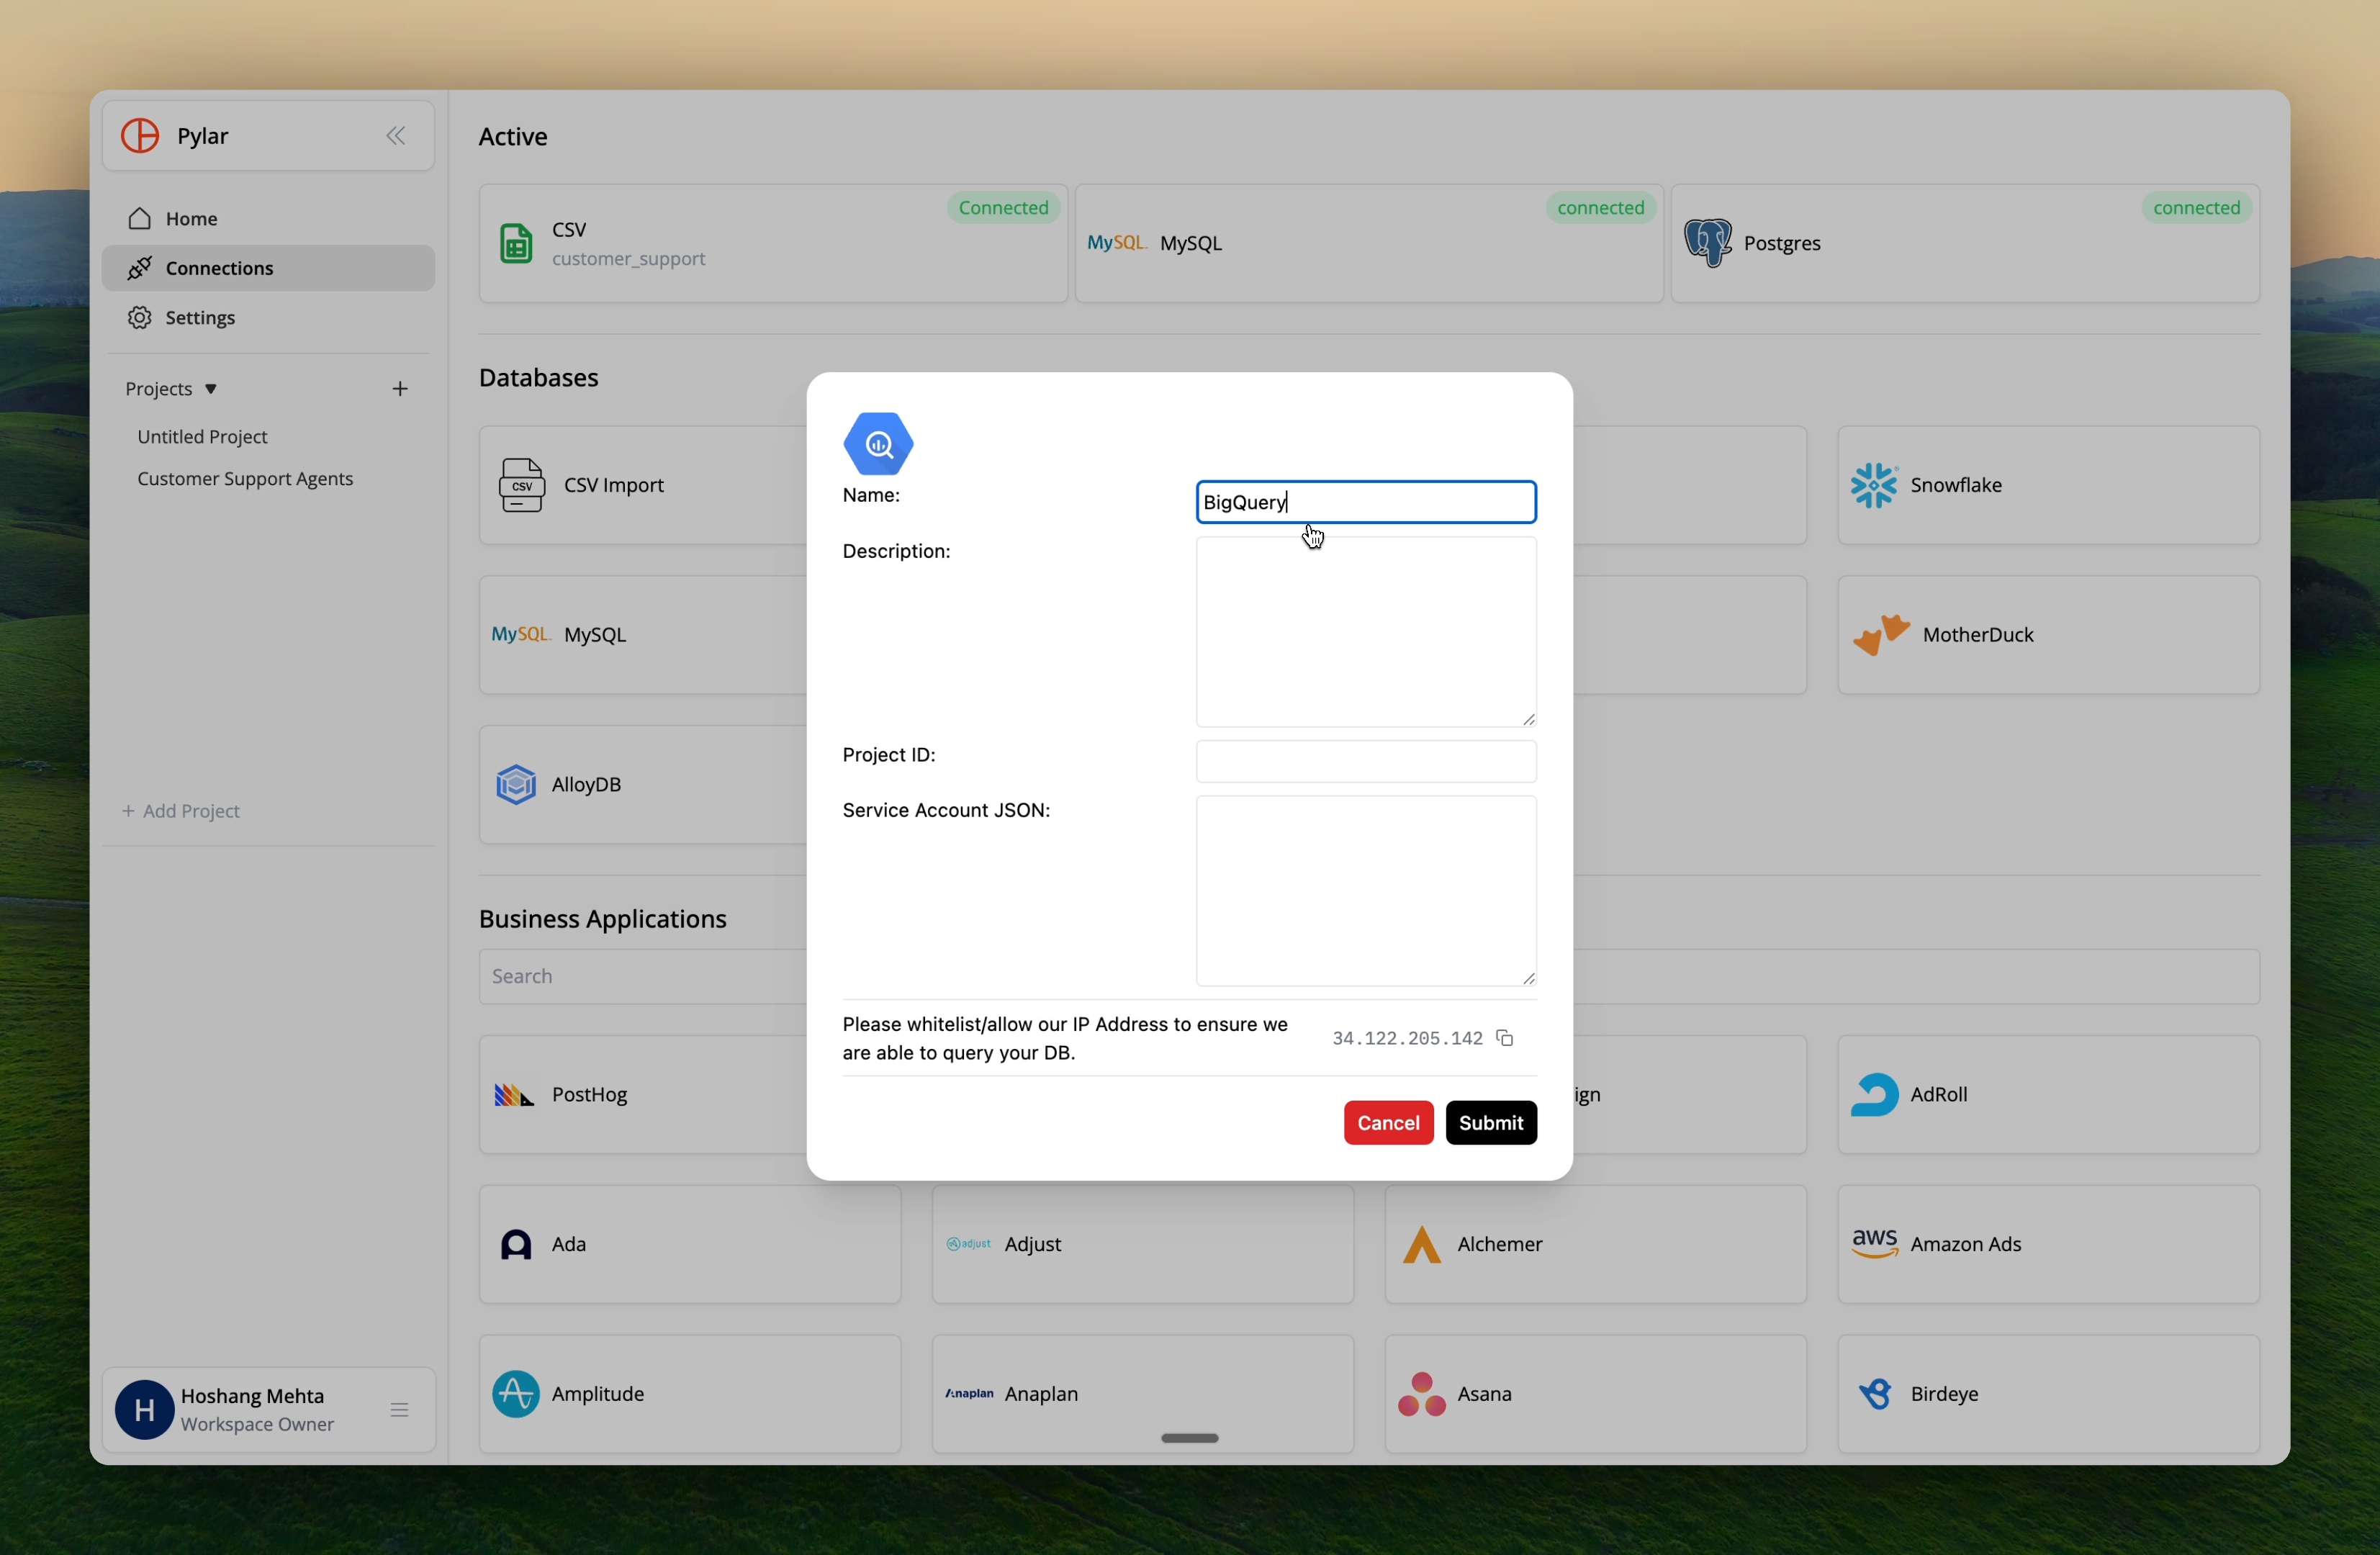
Name
Enter a unique name for this connection to help identify it later. Naming Rules:- Lowercase letters only
- Numbers and underscores allowed
- No spaces or special characters
bigquery_production or analytics_warehouse
Description (Optional)
Provide a description of what this connection will be used for. Example: “Production BigQuery warehouse for customer analytics”Project ID
Enter the Google Cloud Project ID where your BigQuery dataset is hosted. How to find it:- In Google Cloud Console, go to your project
- The Project ID is displayed at the top of the dashboard
- Format:
my-project-id-12345
Service Account JSON
Provide the JSON key file associated with your service account. How to create:- In Google Cloud Console, go to IAM & Admin → Service Accounts
- Create a new service account or select an existing one
- Grant necessary BigQuery permissions:
BigQuery Data Viewer(to read data)BigQuery Job User(to run queries)
- Create a JSON key:
- Click on the service account
- Go to Keys tab
- Click Add Key → Create new key
- Select JSON format
- Download the JSON file
- Copy the contents of the JSON file and paste it into the Pylar field
Step 4: Whitelist Pylar IP Address
To ensure seamless connectivity, whitelist Pylar’s IP address in your Google Cloud settings: Pylar IP Address:34.122.205.142
How to whitelist:
- In Google Cloud Console, go to VPC Network → Firewall Rules
- Create a new firewall rule or modify existing rules
- Add
34.122.205.142to the allowed IP addresses - Or configure your BigQuery dataset access settings to allow this IP
Step 5: Submit Connection
- Review all the information you’ve entered
- Click “Submit” to establish the connection
Step 6: Connection Validation
Once submitted, Pylar will:- Validate the connection details
- Test the connection to BigQuery
- Begin indexing your BigQuery data
Step 7: Wait for Indexing
After the connection is established:- Data indexing begins: Pylar indexes your BigQuery data for easier querying
- Processing time: May take a while depending on data volume
- Notification: You’ll receive an email and in-app notification when indexing is complete
Your data remains in BigQuery. Pylar only indexes metadata for autocompletion and query optimization—no data is copied.
Using Your BigQuery Connection
Once connected and indexed:Query BigQuery Data
- Go to the SQL IDE in Pylar
- Reference your BigQuery connection by name:
- Run queries that execute on your BigQuery infrastructure
Join with Other Sources
You can join BigQuery data with other connected sources:Troubleshooting
Issue: Connection test fails
Solutions:- Verify Project ID is correct
- Check service account JSON is valid
- Ensure service account has proper permissions
- Verify IP address is whitelisted
Issue: “Permission denied” errors
Solutions:- Ensure service account has
BigQuery Data ViewerandBigQuery Job Userroles - Check dataset-level permissions
- Verify IP address
34.122.205.142is whitelisted - Review Google Cloud IAM settings
Issue: Data not appearing
Solutions:- Wait for indexing to complete (check email notification)
- Verify dataset and table names are correct
- Check service account has access to the datasets
- Review BigQuery query logs for errors
Issue: Slow queries
Solutions:- This is normal for large datasets—queries run on your BigQuery infrastructure
- Optimize your queries (add filters, use LIMIT)
- Check BigQuery query performance in Google Cloud Console
Best Practices
Service Account Security
- ✅ Create a dedicated service account for Pylar
- ✅ Grant only necessary permissions (read-only if possible)
- ✅ Regularly rotate service account keys
- ✅ Monitor service account usage in Google Cloud
Connection Naming
- ✅ Use descriptive names:
bigquery_prod,bigquery_staging - ✅ Include environment:
bigquery_production,bigquery_development - ✅ Be consistent with naming conventions
Data Access
- ✅ Grant access only to necessary datasets
- ✅ Use dataset-level permissions when possible
- ✅ Monitor query usage through BigQuery logs
Next Steps
Now that BigQuery is connected:- Creating Data Views - Create views using your BigQuery data
- Cross-Database Joins - Join BigQuery with other sources
- Connection Security - Secure your connections
Create Your First View
Use your BigQuery connection to create data views